Eating Oxford
On Cooking Southern: Sourdough Delights
Southernism of the Week:
Hell and high water (interchangeable with Lord willing and the creek don’t rise): Usually expressed as “Come Hell and High water” or “going through Hell and high water”… meaning to go through difficult circumstances, all equally bad, to accomplish something. Think Eric Shinseki and Congress in the wake of the VA hospitals scandal. This American expression dates back as far as the 1880s, possibly referring to herding cattle through the Texas and Kansas and Arkansas heat across flooded rivers… both daunting.
SCRATCH SOURDOUGH STARTER MAKES UP YUMMY BREADS AND CAKES
Two weeks ago The Old Bride started a chemistry experiment making up yeast starter from scratch.
The process required an act of pure faith. And it worked! It probably helped that I also was making up friendship bread starter with packaged domestic yeast in the same room.
Is it possible that those little ol’ domesticated yeast cells were jumping the broom with the wild yeast floating in the air?
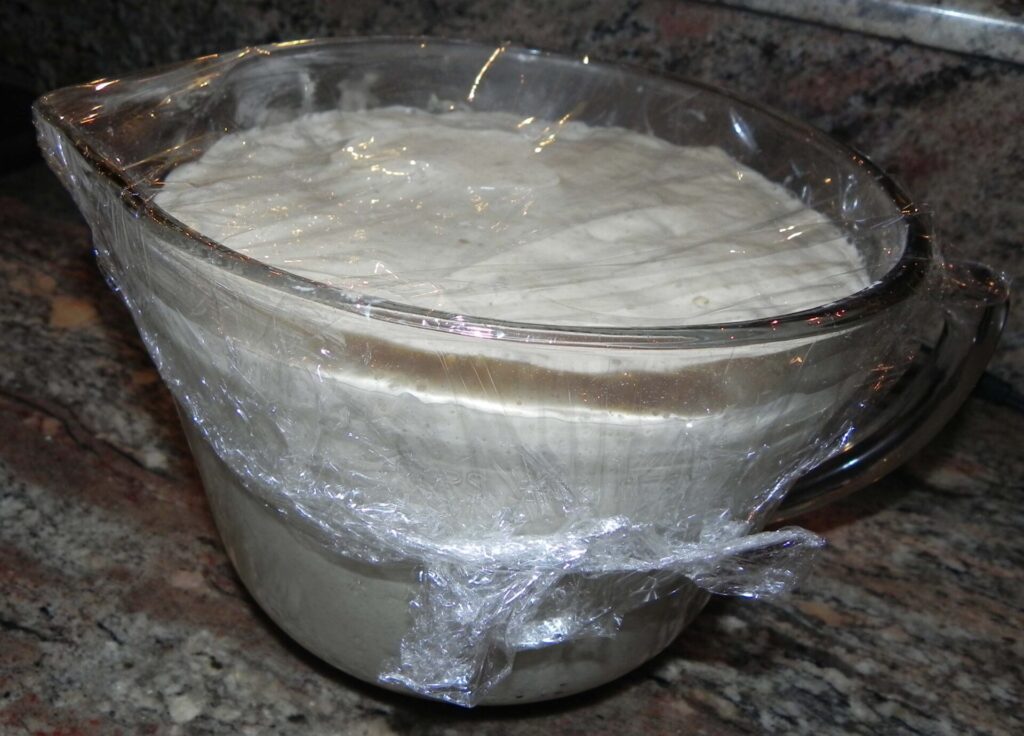
At any rate, my sourdough starter started off looking like a thick lump of tan tile grout. But it started bubbling by Day Two. And even after refrigeration for a day, the starter did exactly what it was supposed to do through Day Seven, which is when I had time to use it.
I experimented with a recipe for Dilly Sourdough Biscuits, which had a lovely cracker-like flavor, but which didn’t rise enough to suit my tastes. (Hubby pointed out that I’ve never been a good biscuit maker because I ALWAYS work the dough too much.) I intend to try that recipe again in the future, after allowing the starter to do its magic for a couple of weeks.
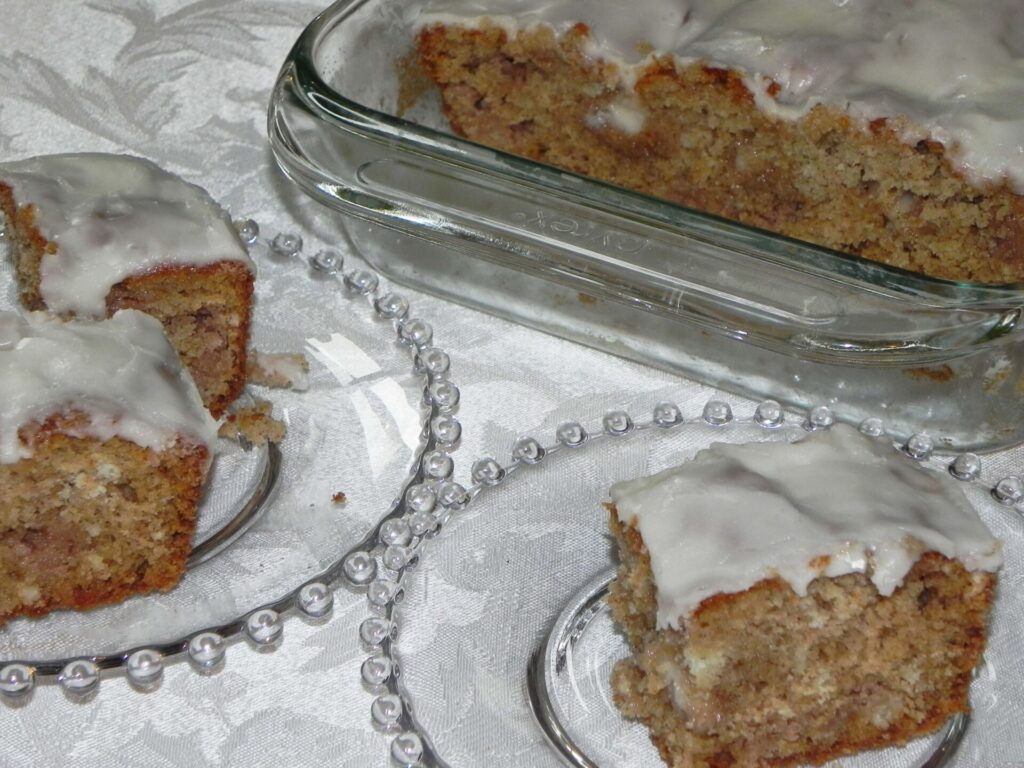
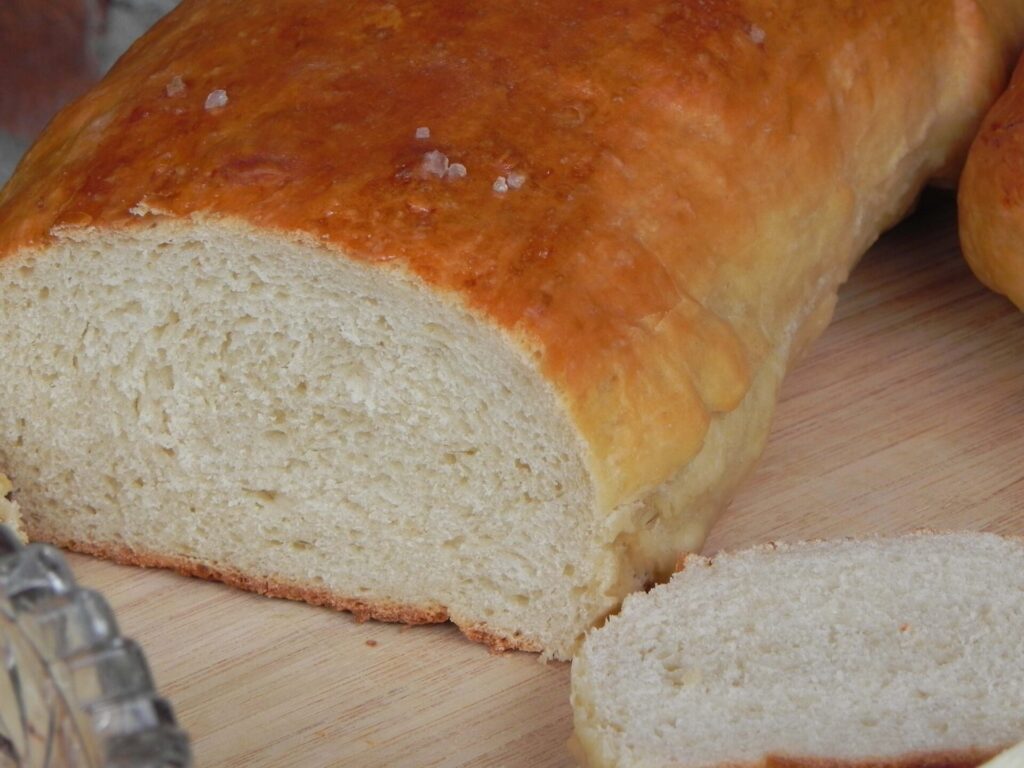
However, I hit paydirt tweaking two other recipes: One for a tangy, tasty sourdough streusel cake, and the other for San Francisco-style sourdough bread.
I have learned that sourdough starter is like a child, demanding regular care and feeding. Is it worth the effort? Like all children, I believe it is.
Some sourdough starters have been documented to live indefinitely, passed down in families, with regular feeding and handling. If I hadn’t been going out of town, I would have kept my original starter going just to be able to make sourdough bread once a week.
When I get back to town, I will make up a new starter. I think I’ll name her Agnes.
SOURDOUGH STARTER
 This starter uses the chemistry of fermentation caused by capturing wild yeast floating in the air. The yeast cells are single-cell fungi and they break down starches to form sugar. The starch and sugar breakdown results in formation of carbon dioxide gas and alcohol through simple fermentation.
The wild yeast fungi in sourdough starter are kept alive by “feeding” the liquid medium new flour and water. We know a starter is viable when it smells “yeasty” and alcoholic, and the liquid medium is thick and bubbly. If the starter turns off-color (such as pink), throw it out!! Viable starter becomes lighter as it ages.
You will need whole-wheat flour, non-chlorinated water, and all-purpose flour for your starter. Whole-wheat initially attracts the wild yeast more than further-refined flour.
Don’t attempt to make starter during cold weather. The ambient temperature needs to be at least 68˚F, and ideally 70-72˚F. Warm but not hot space works best.
Day 1: PREPARE THE WATER:
To prepare for making a sourdough starter, make sure to get distilled or purified water, or make your own by boiling tap water for about 10 minutes and allowing it to cool completely. NOTE: Most tap water contains chemical additives such as fluoride and chorine, which can kill yeast. I found that boiling a medium saucepan of tapwater for 10 minutes and keeping the water in the saucepan for use as needed worked splendidly.
Day 2: START THE STARTER:
1 c whole-wheat flour
4 oz (1/2 c) of prepared water
Combine the flour and water in a non-reactive bowl. I used an 8-cup Pyrex measuring cup that has a lid. The dough will be very thick, but be sure to mix thoroughly. Loosely cover with plastic wrap and cradle the bottom in a towel to maintain warmth. Place in a warm room-temperature location for about 24 hours. I used the top step to my attic office.
Day 3: FEED THE STARTER (Feeding No. 1).
3/4 c PLUS 2 T unbleached all-purpose flour
4 oz (1/2 c) prepared water
The starter should be slightly dotted with tiny bubbles and may appear somewhat larger in volume. Don’t worry if the appearance doesn’t seem changed. Stir it and the starter will feel less stiff than when made up. It should smell slightly sweet and a bit yeasty.
Stir in the flour and water, working vigorously with a wooden spoon or silicone spatula until completely combined and smooth. Scrape down the sides and loosely cover with plastic wrap. Return the covered container to its towel blanket and place in a warm spot (70-75˚F) for the next 24 hours.
Day 4: FEED THE STARTER (Feeding No. 2).
3/4 c PLUS 2 T unbleached all-purpose flour
4 oz (1/2 c) prepared water
The starter should be looking larger in volume and the surface dotted with bubbles. When you stir the starter you may hear bubbles popping. It will smell a bit sour and musty or “off.” This is good — it means the yeast is actively working.
Add the flour and water and combine thoroughly into a smooth batter. It should start looking like a thick dough. Scrape down the bowl sides and cover loosely with plastic wrap. Return the container to its towel blanket and warm spot for another 24 hours.
Day 5: FEED THE STARTER AGAIN (Feeding No. 3).
3/4 c PLUS 2 T unbleached all-purpose flour
4 oz (1/2 c) water
The starter should be very bubbly and doubled in volume. It should feel looser when stirred than on the previous day, and should smell very sour and pungent.
Add the new flour and water and stir vigorously into the bubbly starter. Scrape down the sides and loosely cover with plastic wrap. Return the container to its towel blanket and warm spot for another 24 hours.
Day 6: READY TO USE THE STARTER.
The starter should almost appear frothy by now, and doubled yet again. You may proceed right now to making up recipes using the starter at this point, or continue as before for another day, but without continuing to bulk up the volume.
If continuing another day, discard about half the original starter before adding the new flour and water in the same amounts as previously. If you plan to use all the starter within the next few days, leave it out, continuing to discard half and feed the remaining half every 24 hours. If it will be longer before you use it, cover starter tightly (use that lid) and place it in the refrigerator. Be sure to take it out of the fridge, feed it, and let it sit out loosely covered overnight before returning it to the fridge.
SOURDOUGH STREUSEL CAKE
 This is surprisingly tasty, and it freezes well.
*Feed the Sourdough Starter:
Sourdough starter (see instructions above)
4 oz plus 2 T unbleached all-purpose white flour
4 oz distilled or purified water
1 T softened butter
Whether refrigerated or not, if the starter has not been fed in 24 hours, remove about half the starter from the starter bowl and feed both halves with 4 oz plus 2 T of unbleached white all purpose flour and 4 oz purified or distilled water. Cover each half loosely and allow to bubble — about 4 hours or longer. Cover one container tightly and place in refrigerator, where it can remain about 6 days without feeding.
Use 1 T of softened butter to completely butter an 8-by-8-inch baking pan. Set aside.
Streusel Topping:
1/2 c all-purpose flour
1/4 c white granulated sugar
1/2 tsp ground cinnamon
1/4 c (4 T) softened butter
Mix the streusel topping by sifting together the first and cinnamon, then whisking it with the first sugar in a medium bowl. Work in the butter with your fingers or a hand mixer until it sticks together and is crumbly. Set topping aside.
Cake Batter:
1 c of fed* sourdough starter
1/3 c canola oil
1 large egg, beaten
1 c all-purpose flour
3/4 c white granulated sugar
1/2 tsp table salt
1 tsp baking soda
1/2 tsp ground cinnamon
Sift together the second flour, sugar, salt, baking soda and cinnamon in a separate bowl and set aside.
In a large mixing bowl, combine the starter with the beaten egg. Stir in the sifted dry mixture until thoroughly combined. Place in the buttered baking pan and spread evenly. Sprinkle streusel mixture evenly across top (may have to pinch small pieces and sprinkle at regular intervals).
Allow cake to rise about 40 minutes uncovered in a warm spot in the kitchen. Bake on middle rack in oven preheated to 375˚F. When cake is ready it will pull away from sides of pan. Test center with toothpick. Remove to a rack to cool.
While cake is cooling, make up icing.
Icing:
1-1/2 c confectioners’ sugar
2-4 T milk
2 T butter, melted
Combine sugar and milk in small bowl, stirring to remove lumps. Add additional milk if too paste-like, but do not make it too thin. Stir in melted butter until completely smooth.
Pour icing evenly over cooling cake. Serve cake still warm or completely cooled. Freeze leftovers or entire cake.
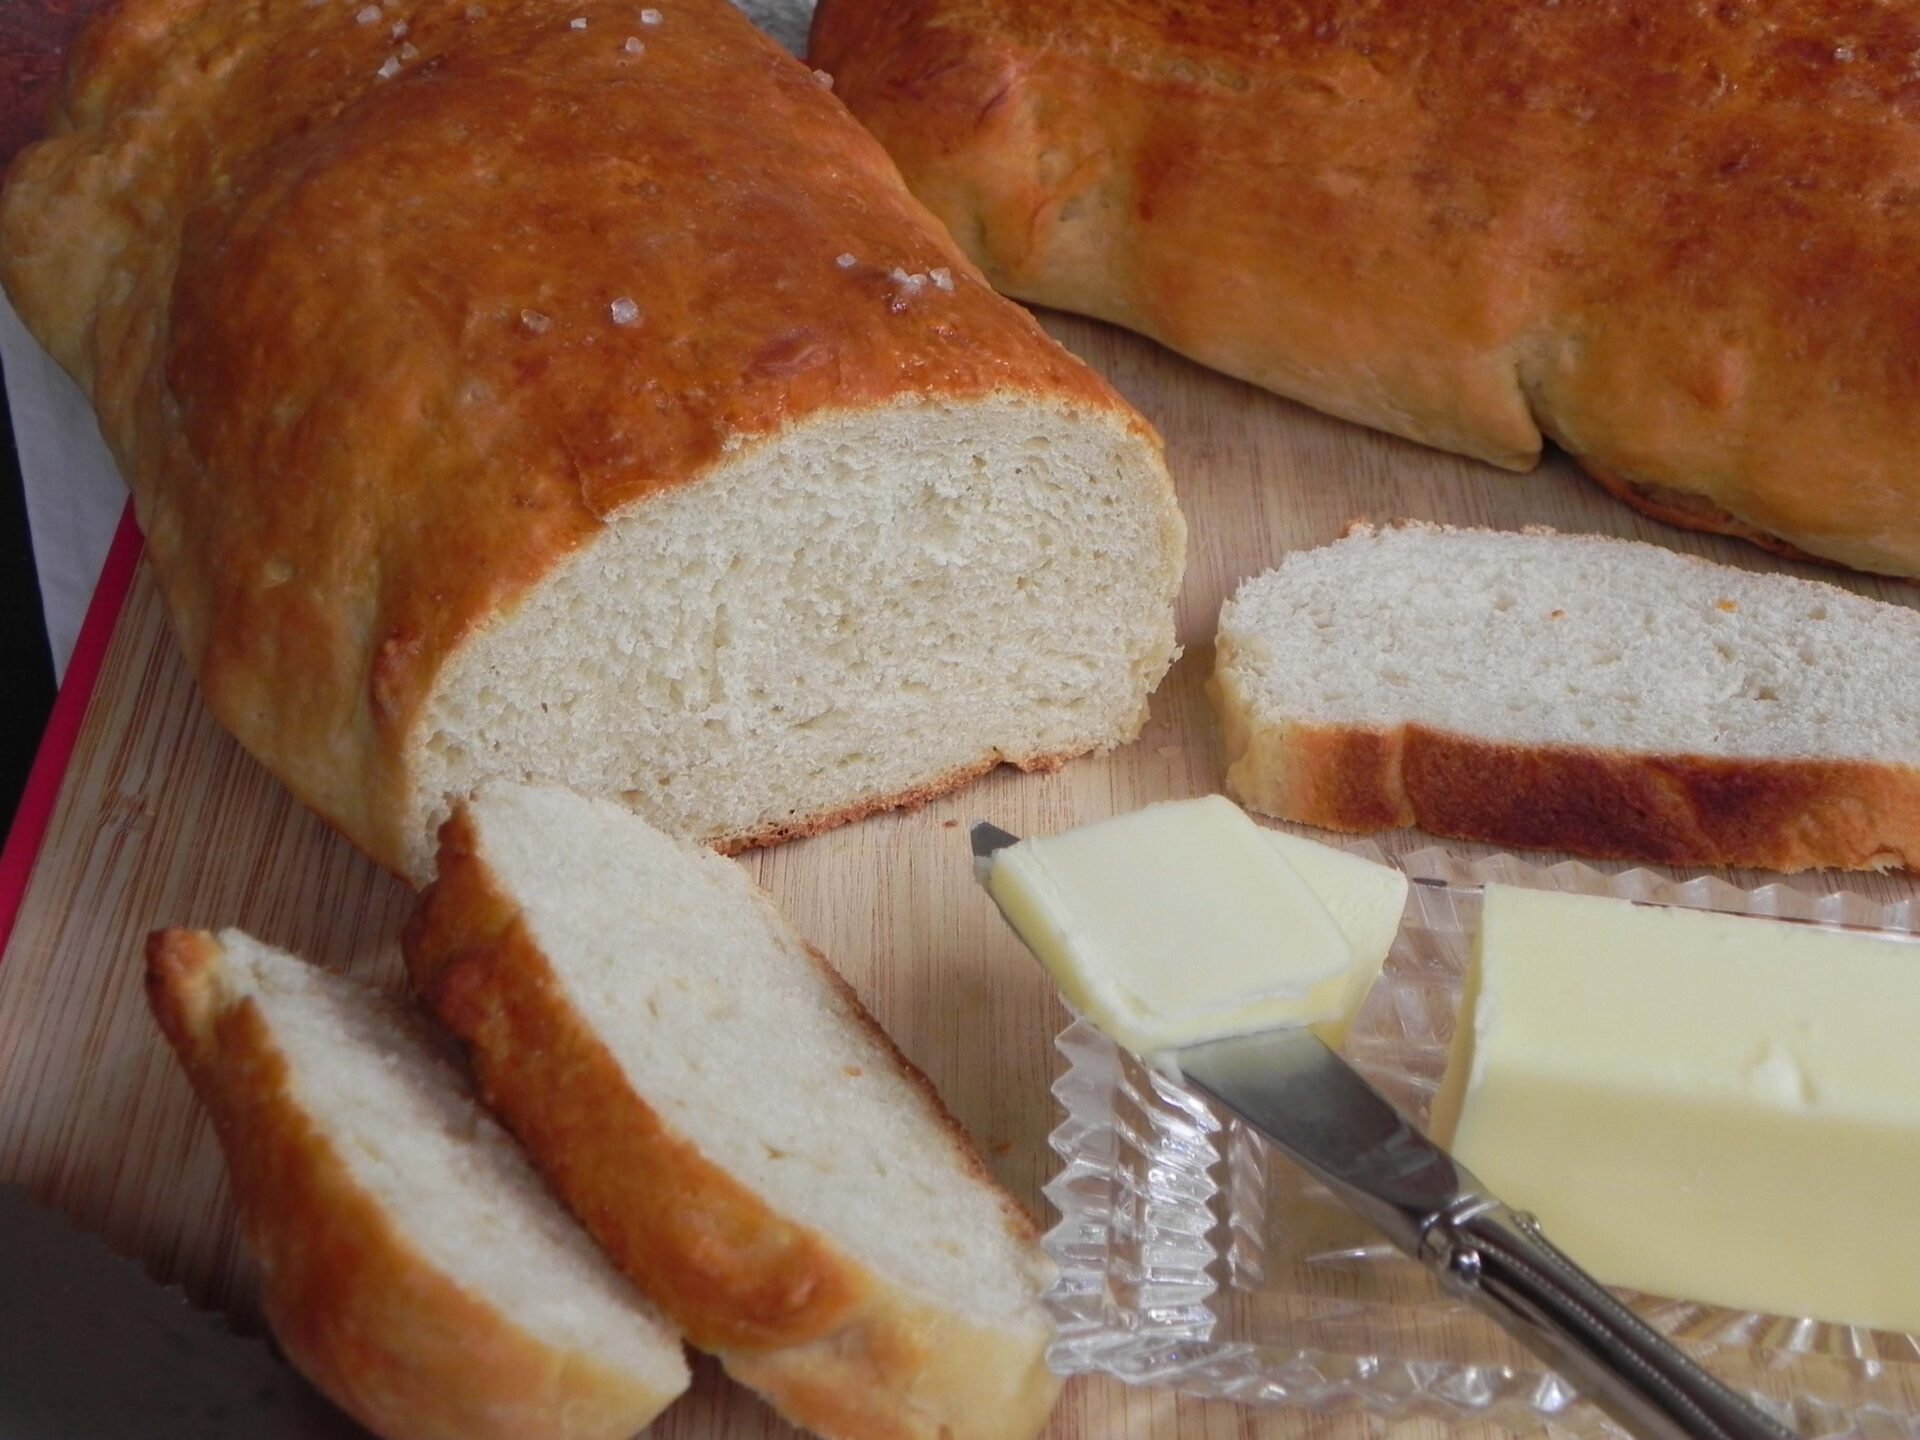
SAN FRANCISCO-STYLE SOURDOUGH BREAD
 This is a beautiful looking, dense, and flavorful bread that combines sourdough starter with packaged active dry yeast to guarantee a good rise. I found that the egg wash should be brushed evenly to completely coat around and down the sides of the loaves to ensure even browning.
1 c bread flour
3 T white granulated sugar
2-1/2 tsp table salt
1 (0.25-oz) pkg active dry yeast
1 c warm milk
2 T butter
2 c sourdough starter
3-3/4 c bread flour
1 egg
1/2 to 1 tsp water
Sea salt
Grease a large mixing bowl with nonstick cooking spray. Blot excess oil.
Combine 1 c flour with the sugar, salt and dry yeast. Whisk ingredients to blend completely.
Heat milk in a small saucepan but not to scalded stage. Add the butter and allow it to melt, stirring gently to dissolve. Use thermometer to gauge temperature; when temperature drop to between 105 and 110˚F, add the milk and butter mixture to the yeast mixture.
Stir in the starter. Mix in remaining flour gradually until completely mixed. Work the dough with hands to compress ingredients together and turn out onto a lightly floured surface. Knead dough for about 8 to 10 minutes by pressing with palms to stretch, and folding the dough to repeat the process. Shape the dough into a ball. Place dough ball into greased bowl and loosely cover with plastic wrap. Allow to rise at least 1 hour, or until doubled in volume.
Spray a baking pan or cookie sheet with nonstick cooking spray. Punch down the doubled dough and allow to rest for 15 minutes. Shape the dough into two oblong loaves. (I use kitchen scales to weigh the two loaves.) Place the two loaves on the prepped pan or sheet at least 4 inches apart, and let rise for 1 hour, or until doubled in size.
Preheat oven to 375˚F. Beat the egg in a small cup and dilute with a small amount of water. Use a soft brush to brush the egg wash completely over entire surface of loaves except for bottom touching the pan. Sprinkle lightly with sea salt. Bake about 30 minutes, until golden brown on all sides. Remove to rack to cool completely before slicing. Makes great toast. Freezes well.
VARIATIONS: Shape the dough into 24 rolls and let rise till doubled in size; or sprinkle egg-washed loaves with a mixture of garlic, sea salt, and chopped onion.
Laurie Triplette is a writer, historian, and accredited appraiser of fine arts, dedicated to preserving Southern culture and foodways. Author of the award-winning community family cookbook GIMME SOME SUGAR, DARLIN’, and editor of ZEBRA TALES (Tailgating Recipes from the Ladies of the NFLRA), Triplette is a member of the Association of Food Journalists (AFJ),Southern Foodways Alliance (SFA) and the Southern Food and Beverage Museum (SOFAB). Check out the GIMME SOME SUGAR, DARLIN’ web site: www.tripleheartpress.com and follow Laurie’s food adventures on Facebook and Twitter (@LaurieTriplette).


